
He was still a kitten last year so we skipped the tree. So far, it seems to be going well. We’re going to put on some non-destructible baubles later today. Wish us all luck.
Merry Christmas from Bun, Jacks, and Jimbo.

He was still a kitten last year so we skipped the tree. So far, it seems to be going well. We’re going to put on some non-destructible baubles later today. Wish us all luck.
Merry Christmas from Bun, Jacks, and Jimbo.
The massive pile of bricks have mocked me since I only used enough to put in the new kitchen window. The time has come, however, to use these up.
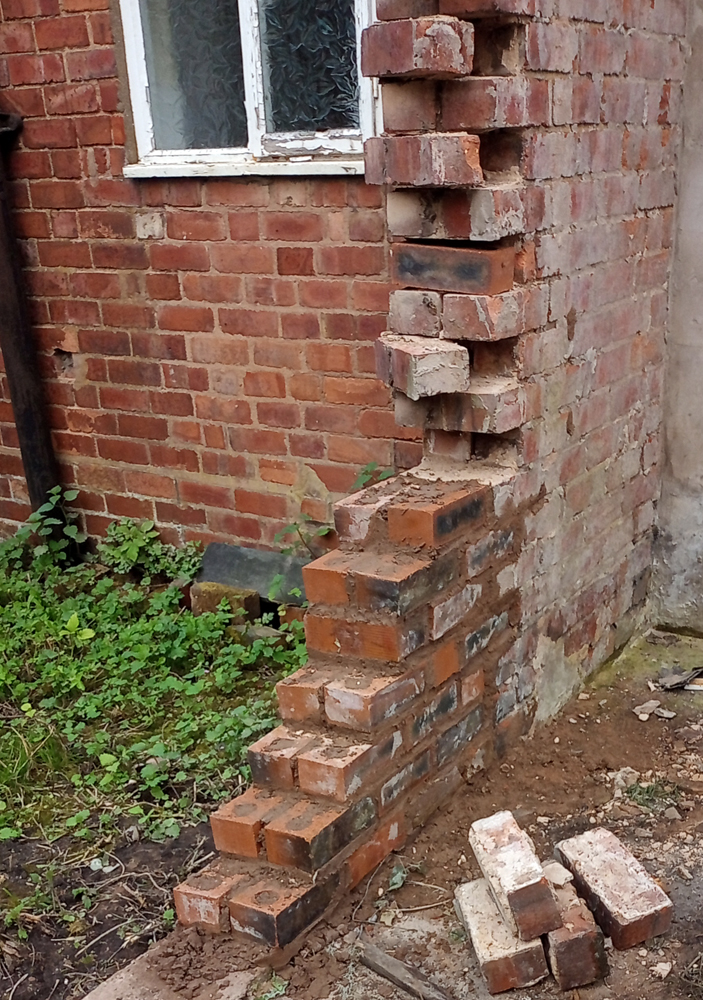
In most of Britain, looking out into your back garden (not usually a euphemism) you own the border to the right and are responsible for it. If you are the left-most resident of a terrace block, then both are yours. I don’t have to fret about the back wall since it is definitely mine as half of it peers out over municipal property and the other half is separated from the next structure’s wall by a half meter gap.

The wall out the right hand side, though, had some rubbish fence panel inserts held up with poorly installed gapped fence posts. When I pulled these down, the need for a foundation to support the new wall became obvious (our house’s previous owner only did enough to the panels to straddle about half their width on her side). We levelled this up then took out every other brick (the ones terminating a run) so that I could feather in the extension and still have one cross brick every row to lend strength to the structure). The topmost one remains for now to hold up the capstone (we need to source some of these) and the bottommost one is there to trigger a new one every half rise/half run.
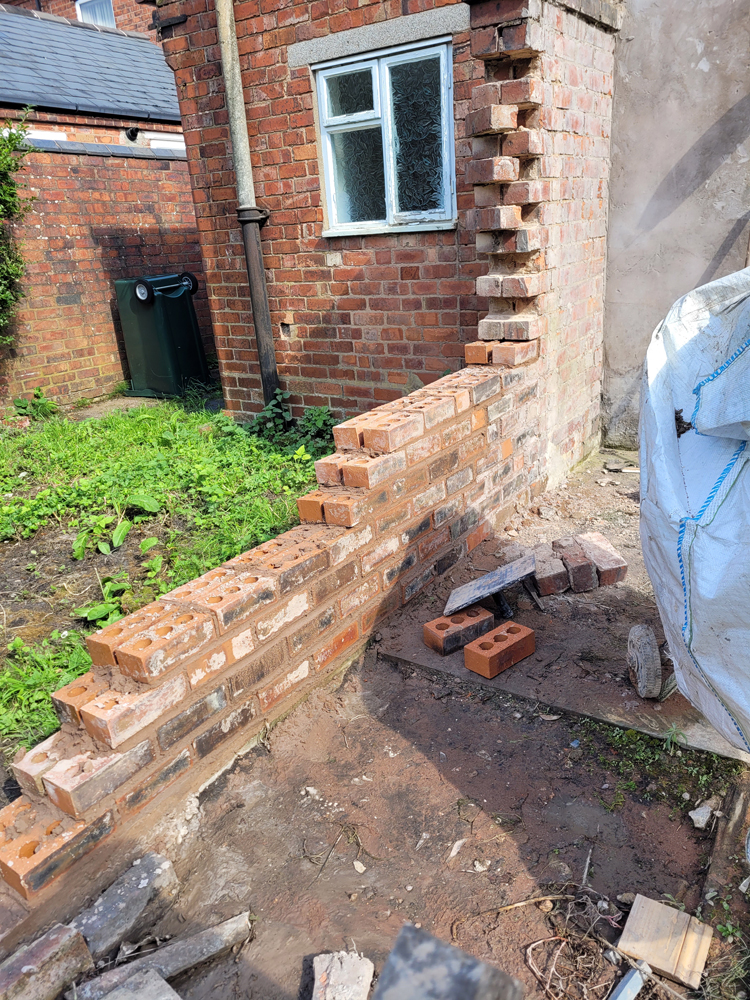
The progress was catch as catch can what with Jimi’s medical issues and our 2+ week illness mid-September. The first full weekend of October, it stood thus (note the new line of bricks working in … these were the ones Jimi took such an interest in the day before taking ill):
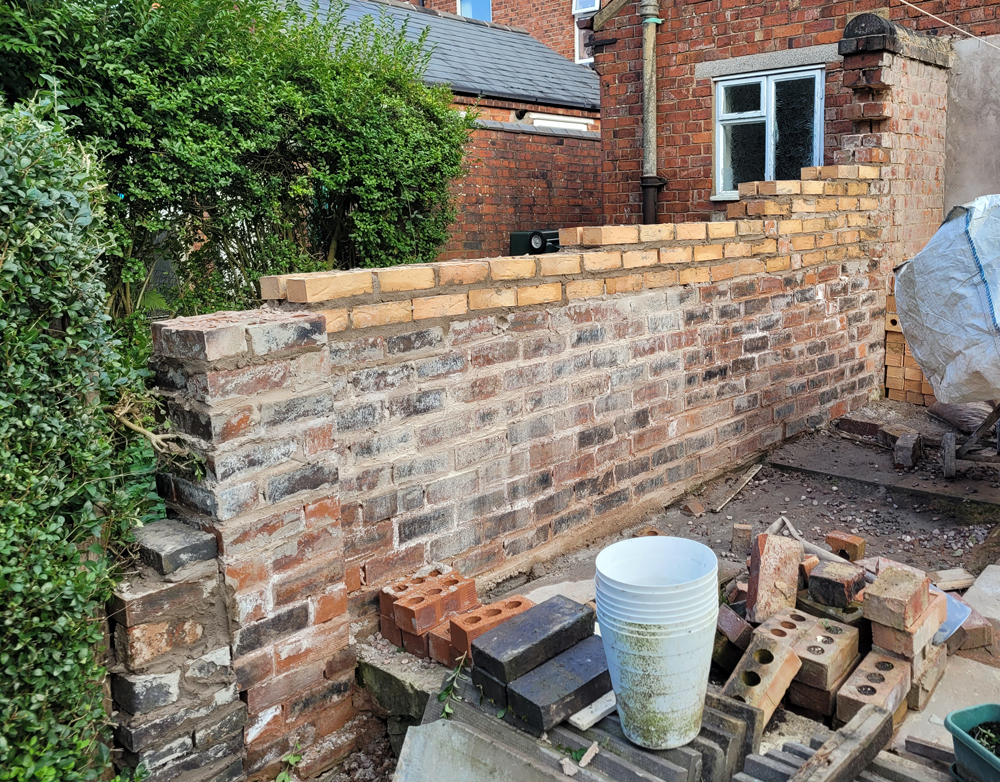
It rained every Saturday thereafter and you have to wait until ‘social hours’ to do anything on Sundays so getting a couple of lines in per week became the norm. As I reached the top but still didn’t have the half round, decorative blue bricks — we’ll do those in the spring — I tidied the sloppily spilled mortar with wire brushes and repointed both sides. Painting to match the rest of the garden walls is also on the short list but here we are, only three months behind plans.

Another year gone by, faster and faster.
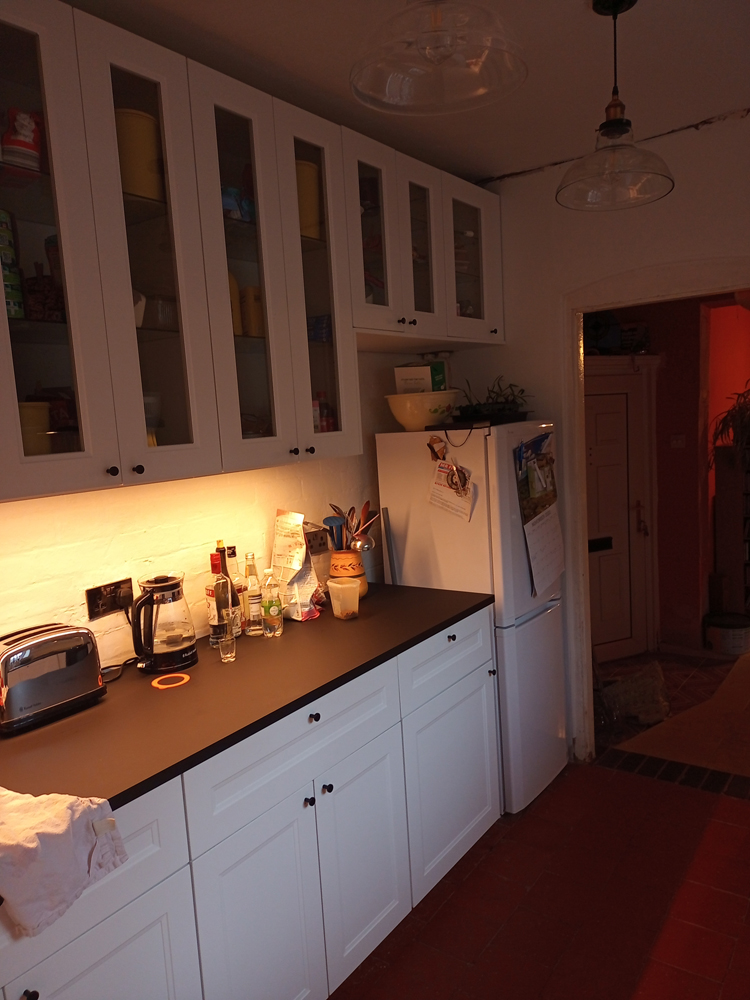
We redid the kitchen and Kesey finally fell to the weather (but Tim is still protecting the garden):

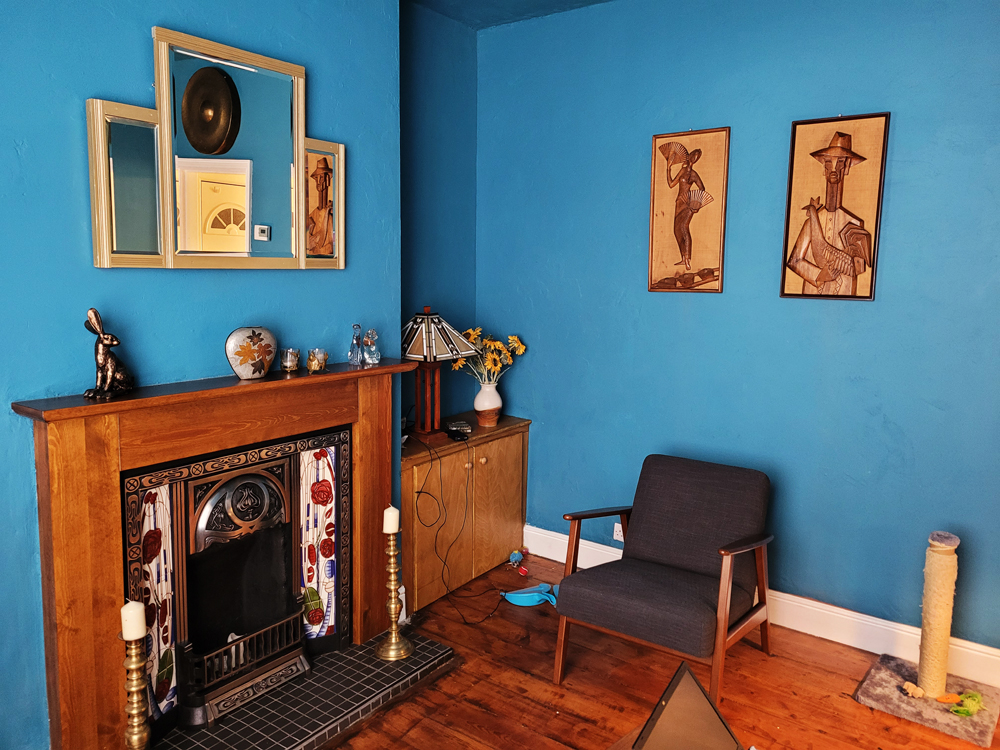
The living room redo turned up some old backing material in our fireplace mirror confirming it to be contemporary with the house construction date:

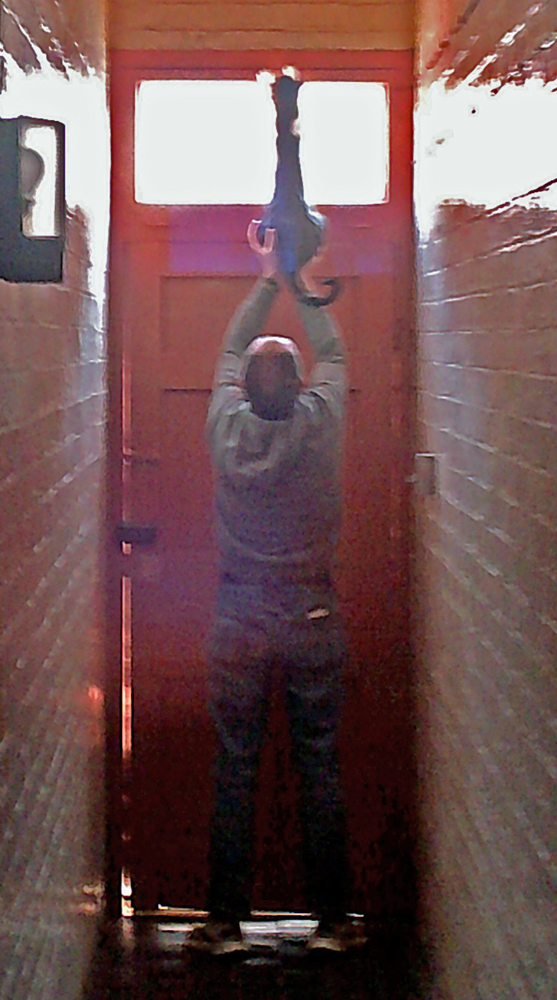
Debra visited in May and took a sneaky photo of me and Jimi playing by the transom at the street door:
Before her visit we finally got some decorations up:

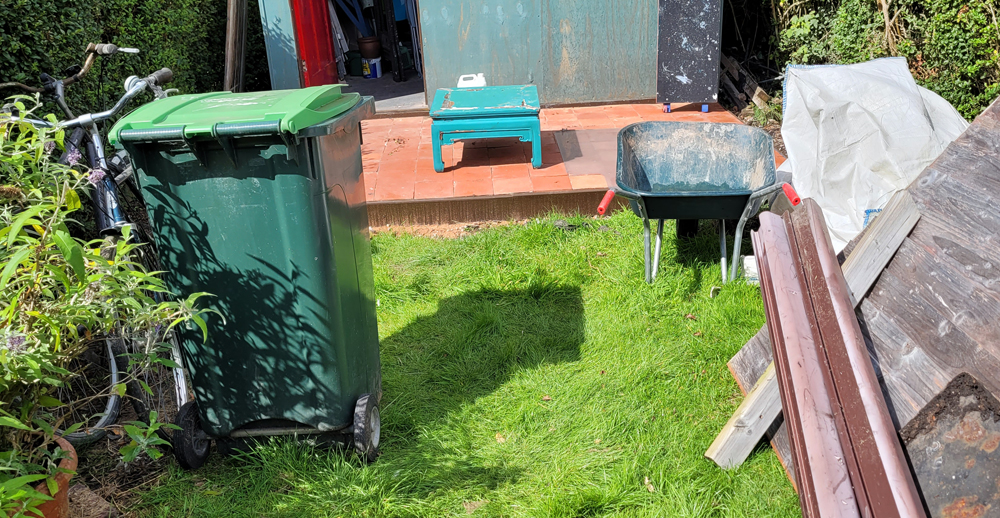
Then, after she left we worked on getting a porch installed by the shed:
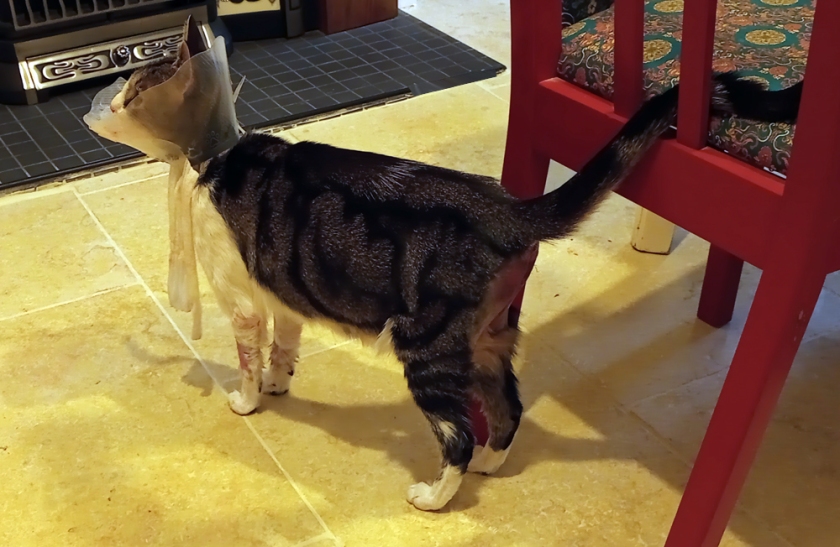
Other major changes got put on hold as some emergency surgery put Jimi and our savings through major changes of their own:
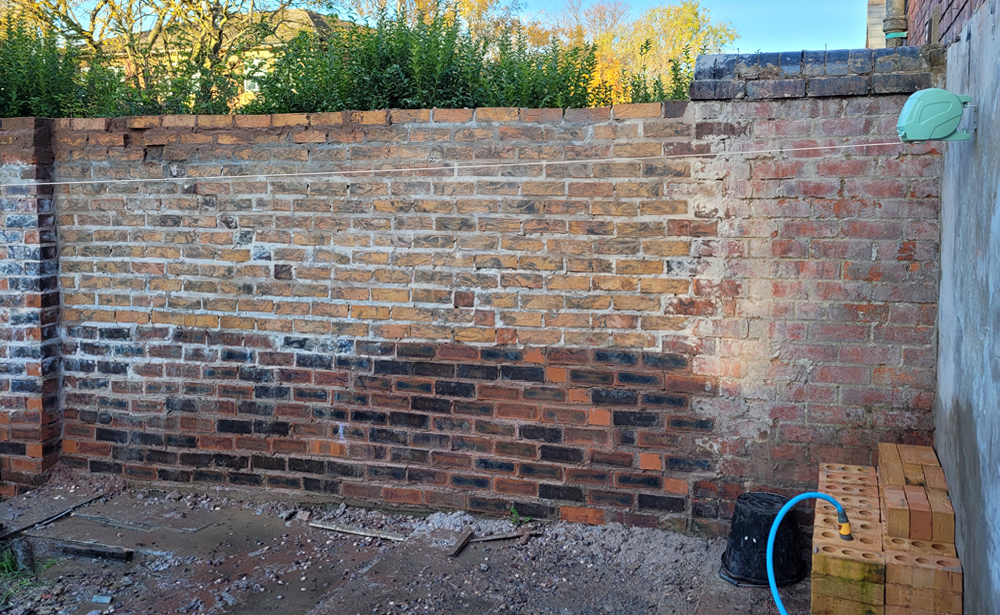
But, I did manage to get a start on replacing the fence between us and the neighbours to the north with a proper brick wall:
The deep, dark winter is setting in, now, and we can focus on indoor projects…none of which are particularly intensive. The worst two will be reconfiguring the downstairs loo and laundry (before next year’s conservatory install) and finishing the flooring in the attic. We renegotiate the mortgage next summer as well so hopefully the overpayments we’ve snuck in have an effect by then.
It is really seeming like we’ve lived here forever despite the constant work and actual short tenure.
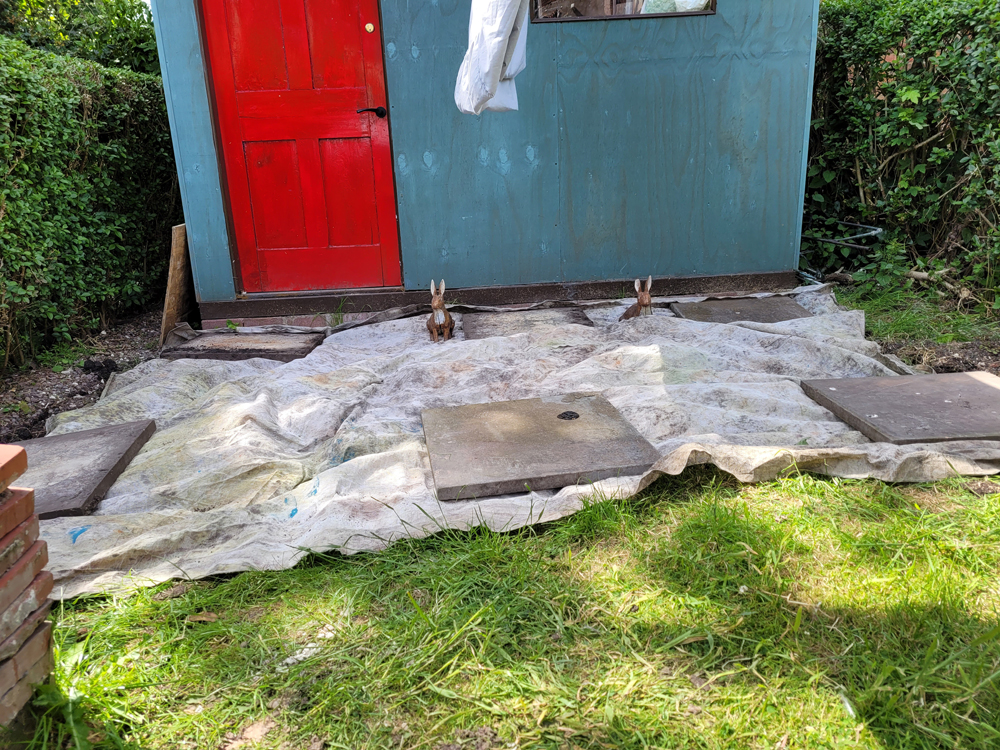
Or, rather, shed patio. One of the two major summer garden projects got started the weekend after Debra flew home and continued until it didn’t anymore: a leisurely 6 weeks compared to similar construction jobs we’ve tackled so far.
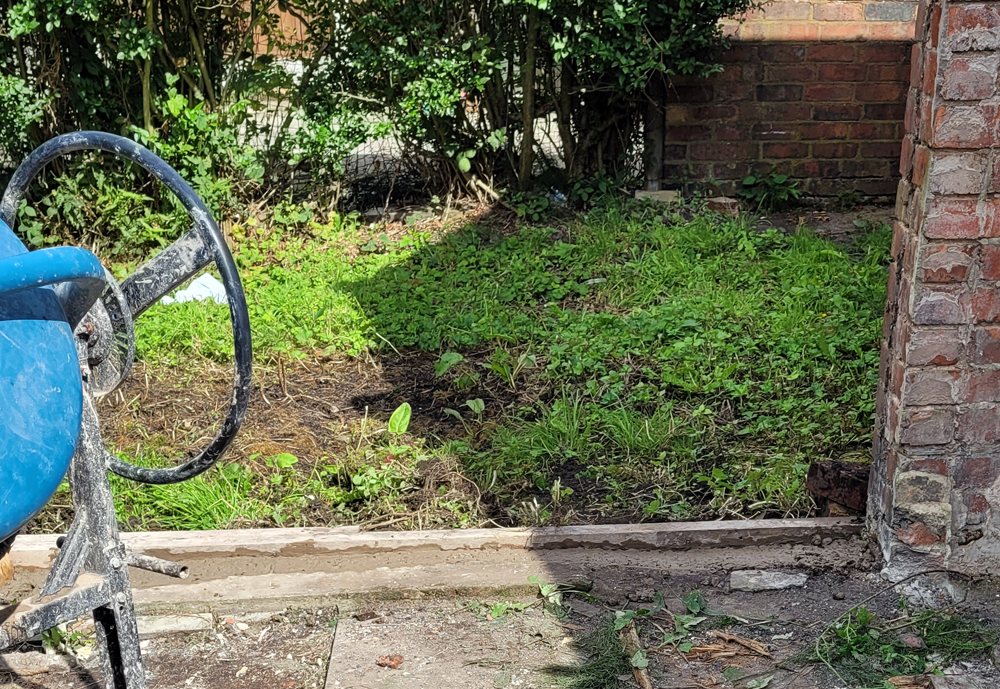
We started by levelling the playing field / excavating the bed of the patio. THAT’s what was going on under the sheet…the first bit of grading required breaking up the turf before seeking the flat earth we suspected existed there, if only the high spots would move into the low ones.
Not worried about the permanence of the sub-slab, I used a bunch of the pavers already removed from other bits of the property to rough-out the now-nearly-level area and to act as filler so I needn’t, eventually, use so much concrete.
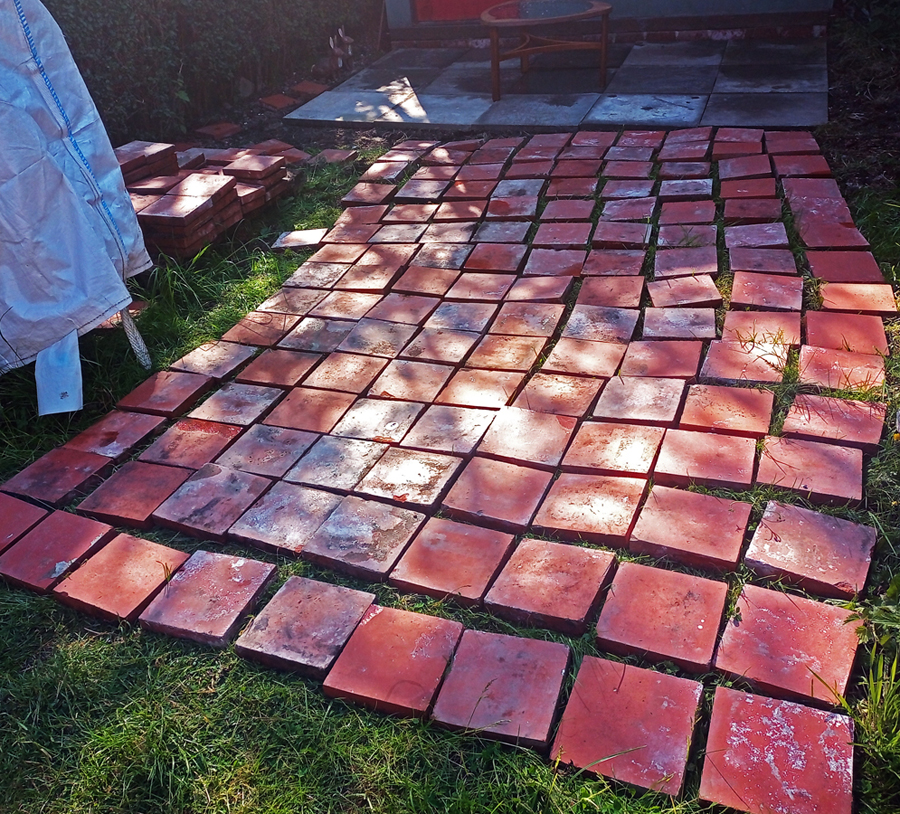
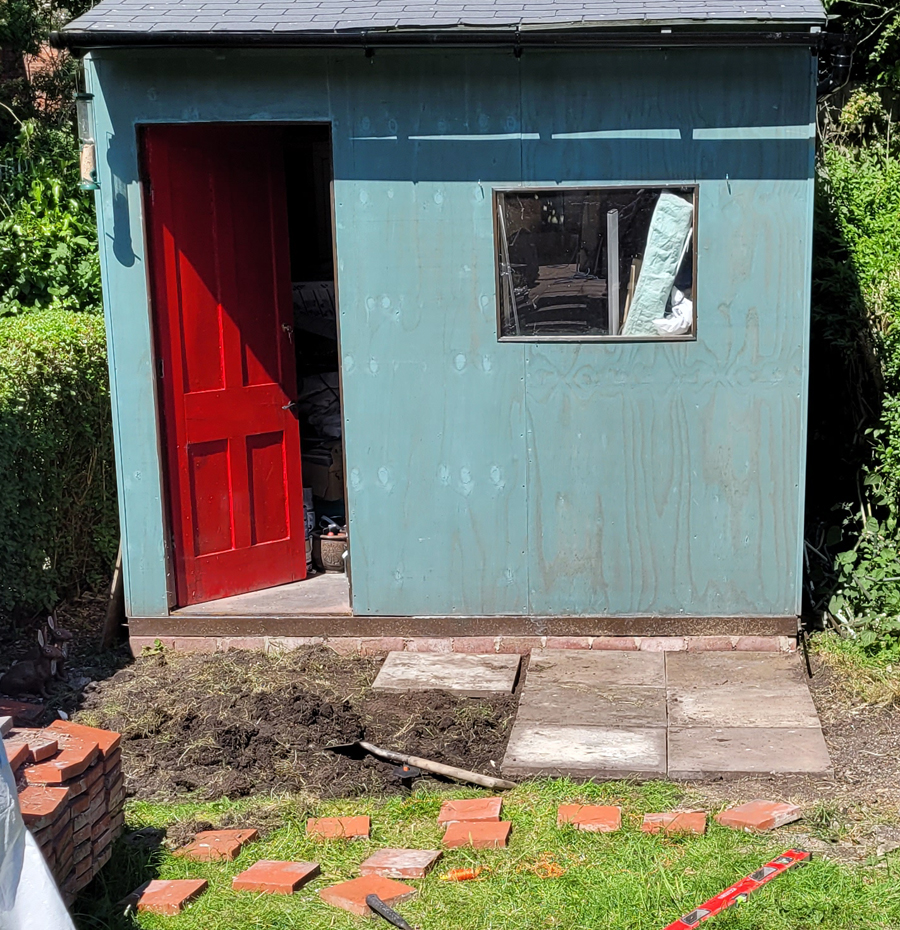
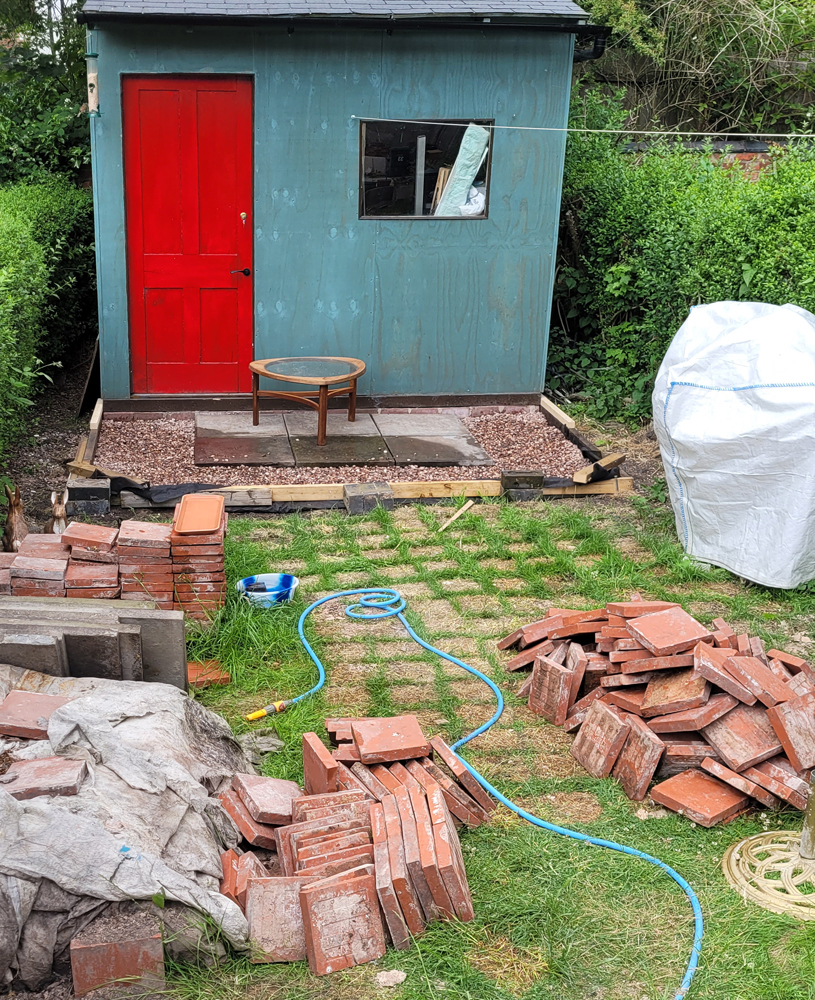
Quarry tiles removed from the house back when we started the dining room refurbs were spread out to facilitate cleaning. The nicest of these were used for the top of the deck while the next best ones were set aside to make the front garden look nice (smaller big project this summer). There was a bit of remaining substrate from 116 years ago that we spent a morning removing, leaving behind that debris and a checker board array of stressed grass.
With gravel levelled, we mixed and poured a self levelling cement over and through then reseated the pavers over this.
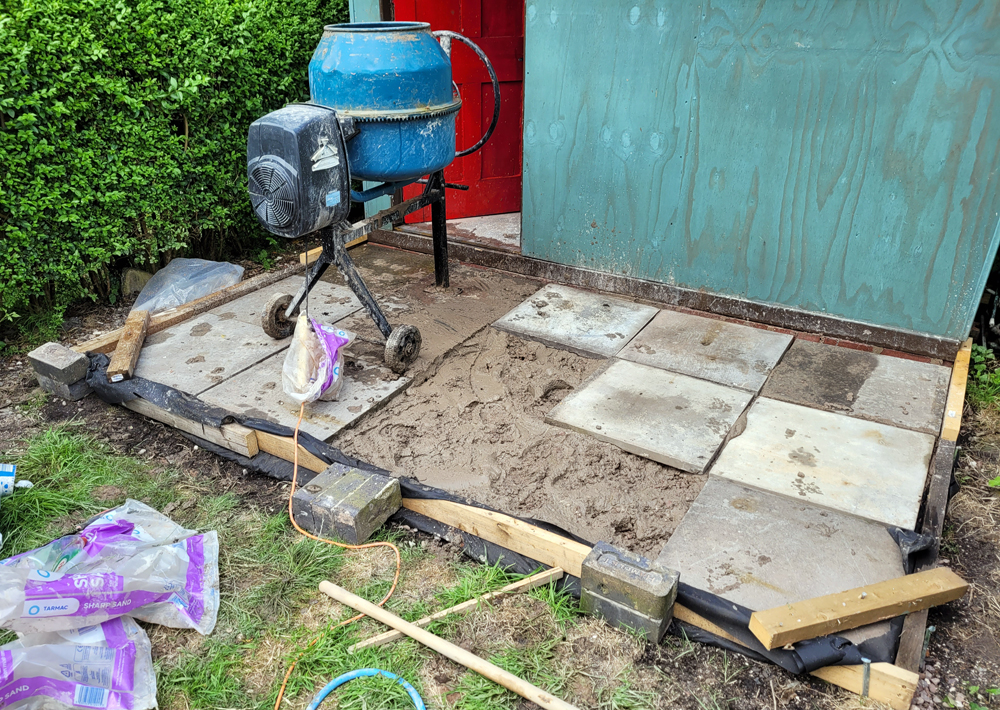
And, put down a screed over that:
This screed served as the tile adhesive for the quarry tiles.
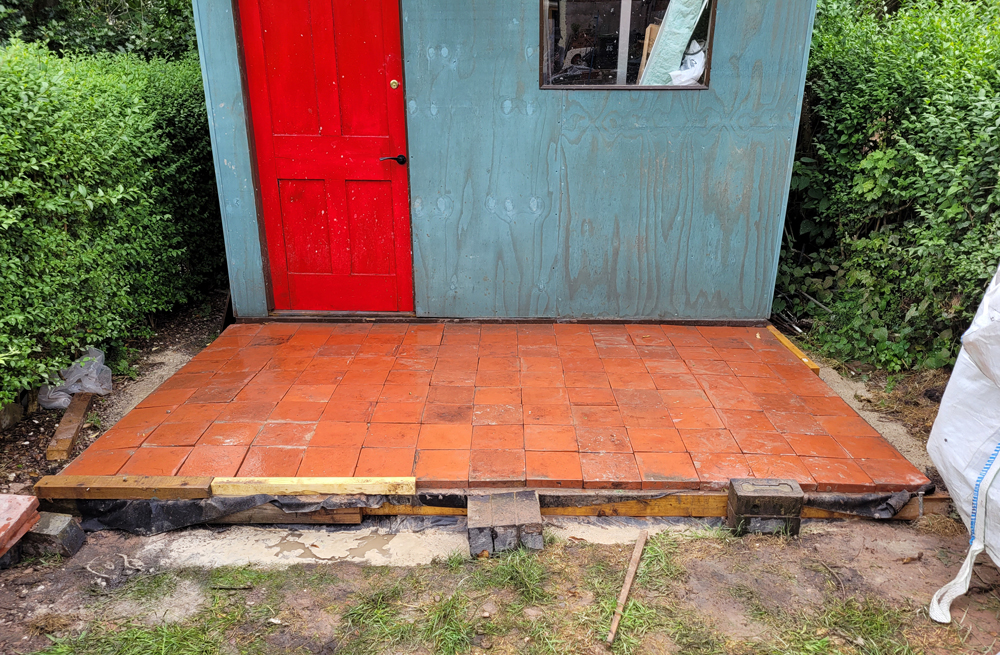
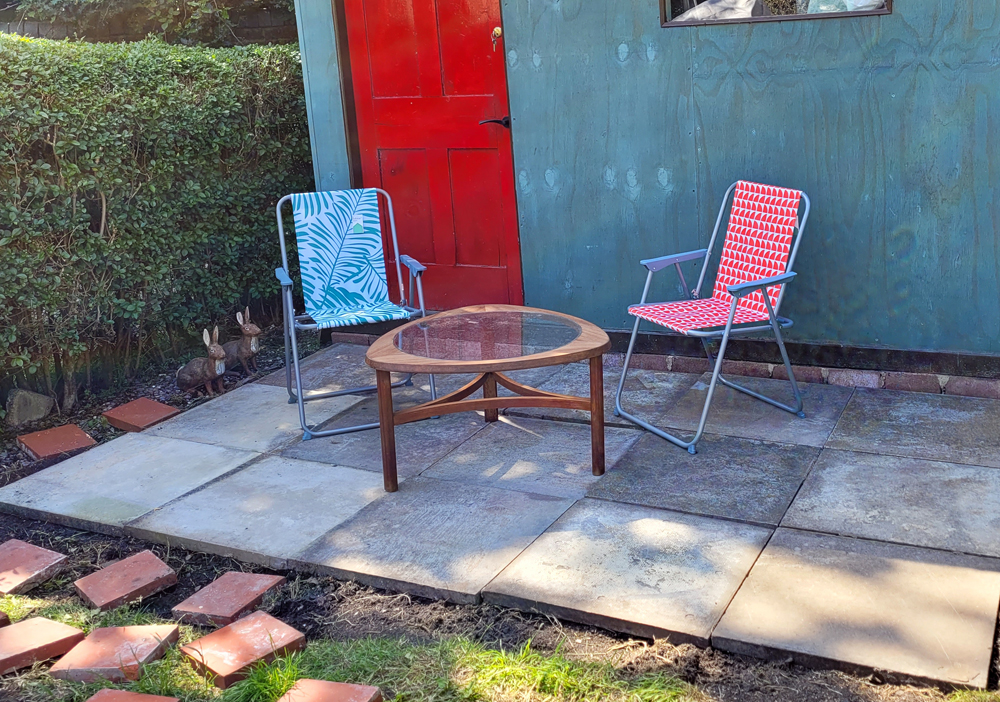
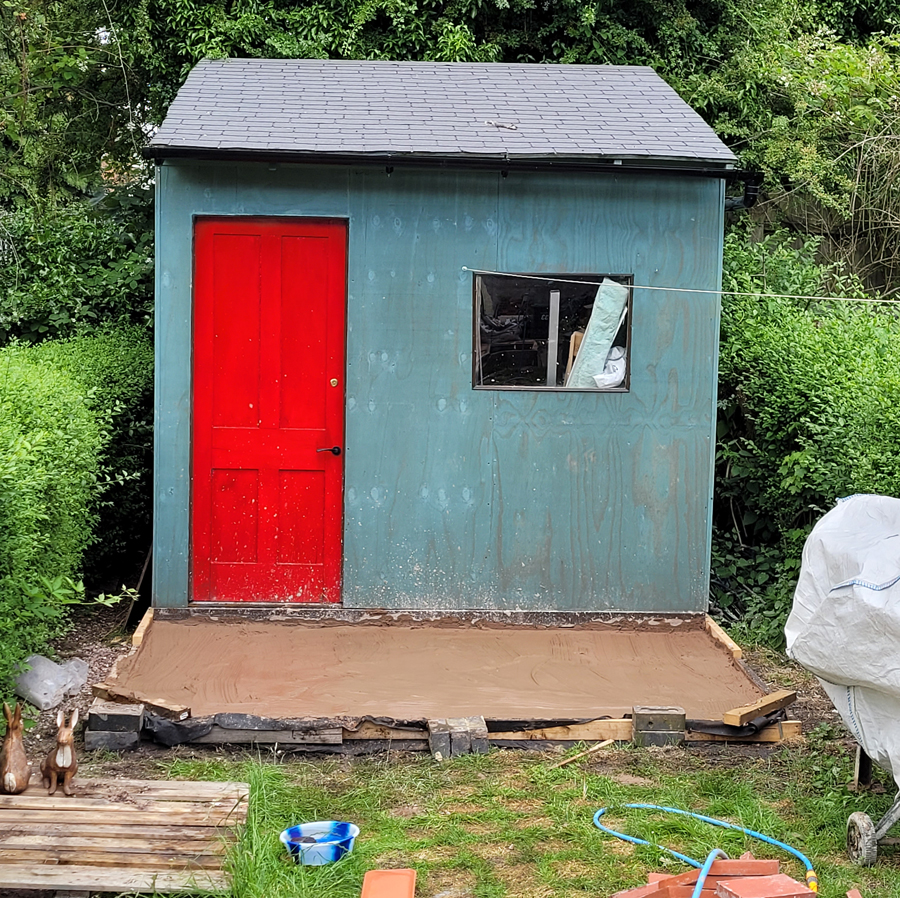
Finally (about 2 months later due to rain and general malaise), we mounted a liner around the border. The entire area is in the shade by 2pm in the longest days of summer so we don’t need a brolly to enjoy the garden. Unfortunately, we have already started replacing our fence with an extension of the wall (hence the debris).

Note to Debra the day before she flies: “We’ll ring you when Jackie is home from work but in the meantime if you go out for any last minute shopping then pick us up a 50 pack of Goodies powders. I just used the last one from about 5 years ago. Also, if you have room, bring me one of these shirts:”

We’ve done as much work on the house after work the past three months as we had planned to do for the whole year, our focus sharpened by our Debra who is finally making good on her threat to come visit. She’s never been out of America and we really wanted her to have a home from home as opposed to a hovel (although I suspect she’s just overwhelmed by the experience).
It was much more effort than this sounds:
Note from Jackie replying to my note to Debra: “Jesus, don’t tell her that, you know she’ll try to find one!” I answered that she’d have to travel back to the 70s to get one and Jackie aptly noted that she won’t travel closer to the 70s than spending a week in West Brom. It begins.
During the endless refurbishment, the space running between the kitchen and the wall to the neighbour’s place and that leads to the garden has suffered immense indignity. Most of the lumber and tile cutting was done there and don’t even get me started on the window replacement.
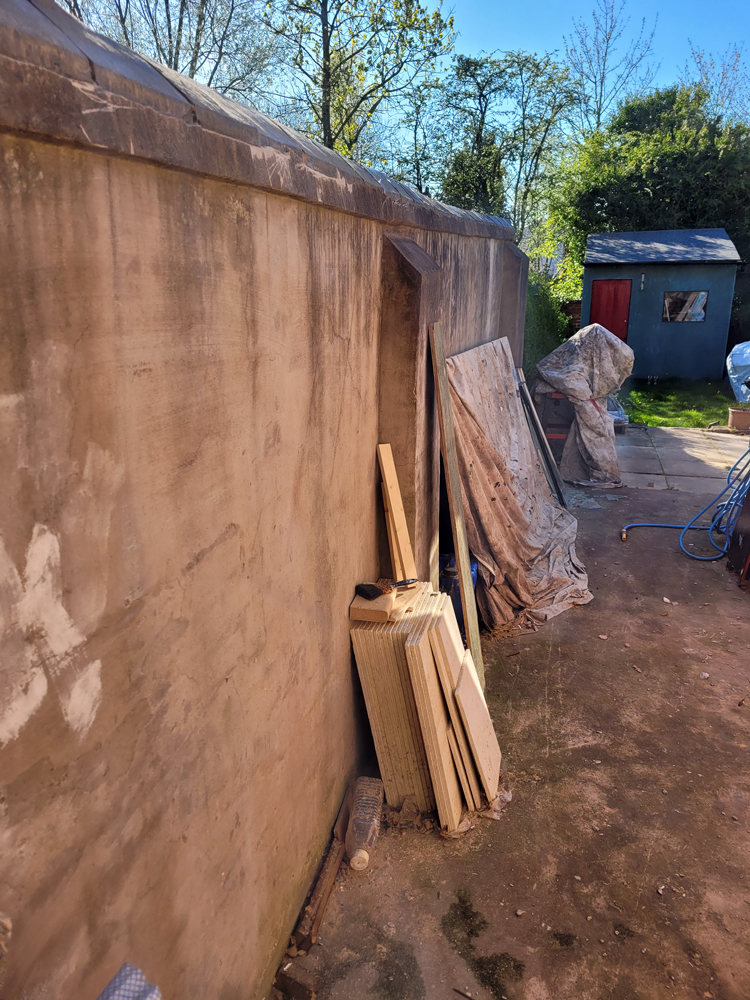
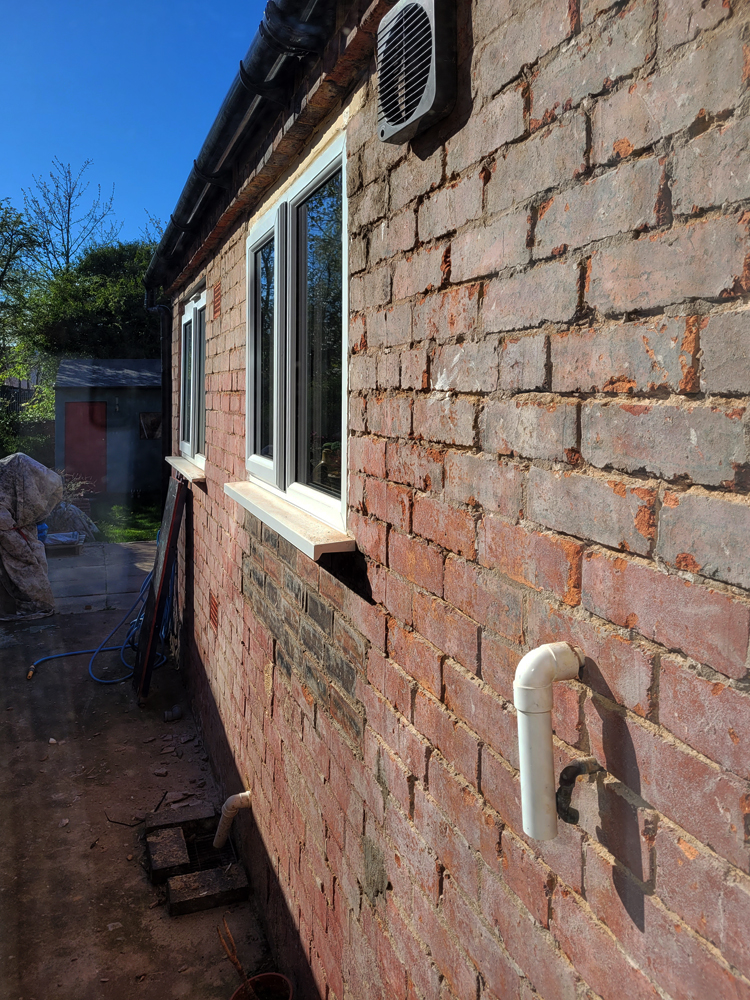
But, spring arrived and I couldn’t put off repointing the kitchen wall, finishing removal of the render on it, and evening up the render on the neighbours’ wall, then finally covering it with waterproof — but breathable — paint.
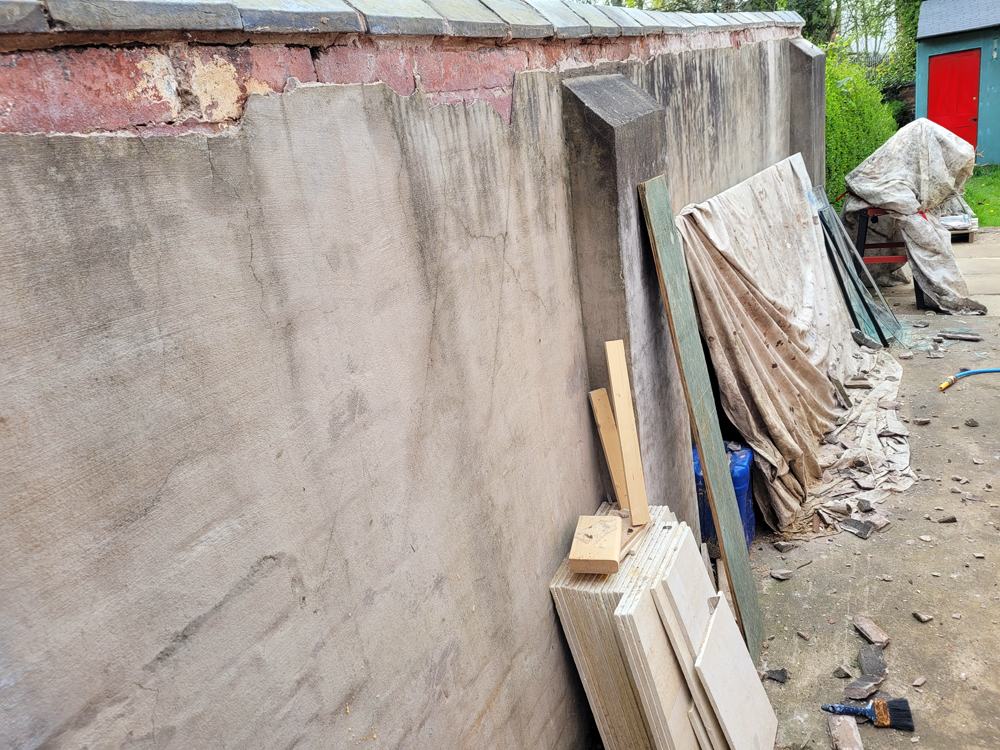
It got worse before it got better:
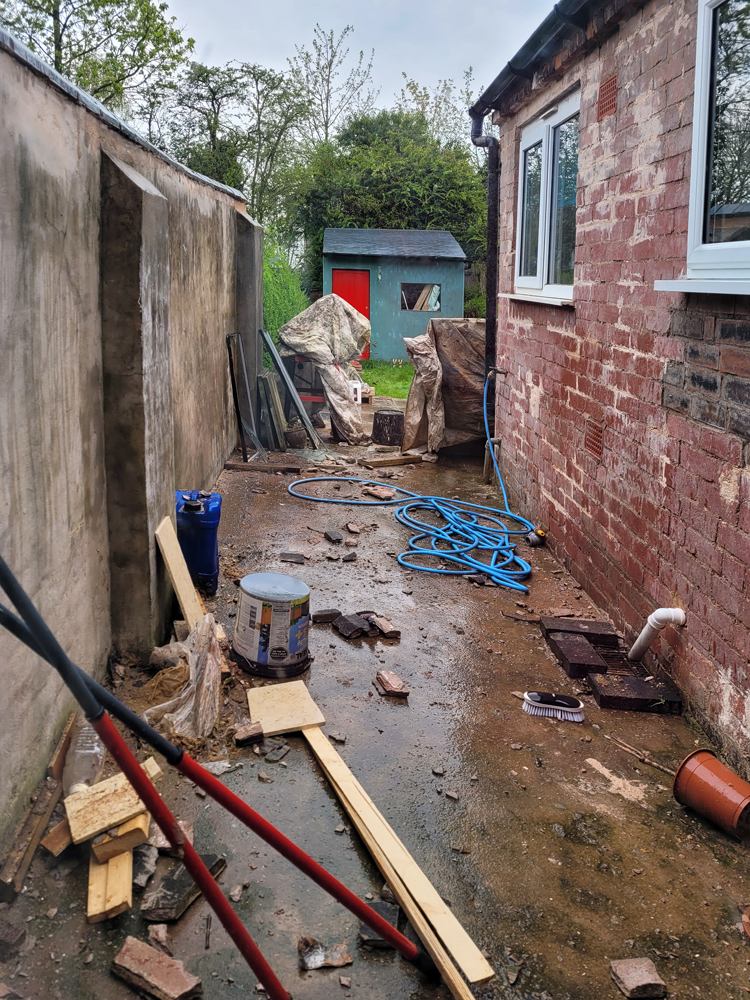
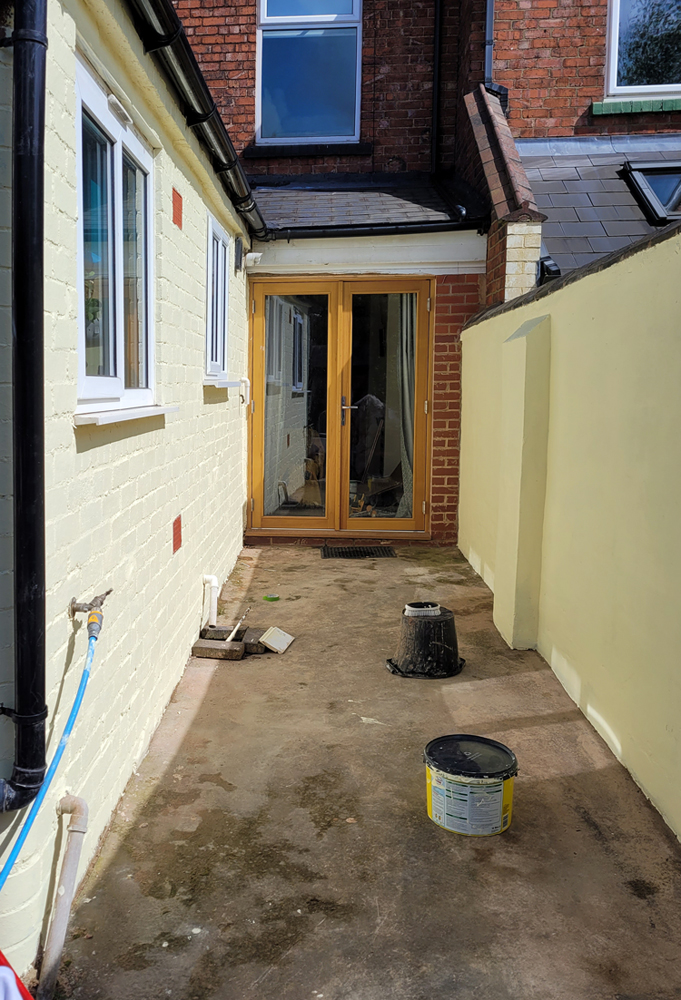
The paint went on both easier and with more trouble than anticipated (including a rain delay and difficulty covering the mortar lines).

Now, to attack the garden….
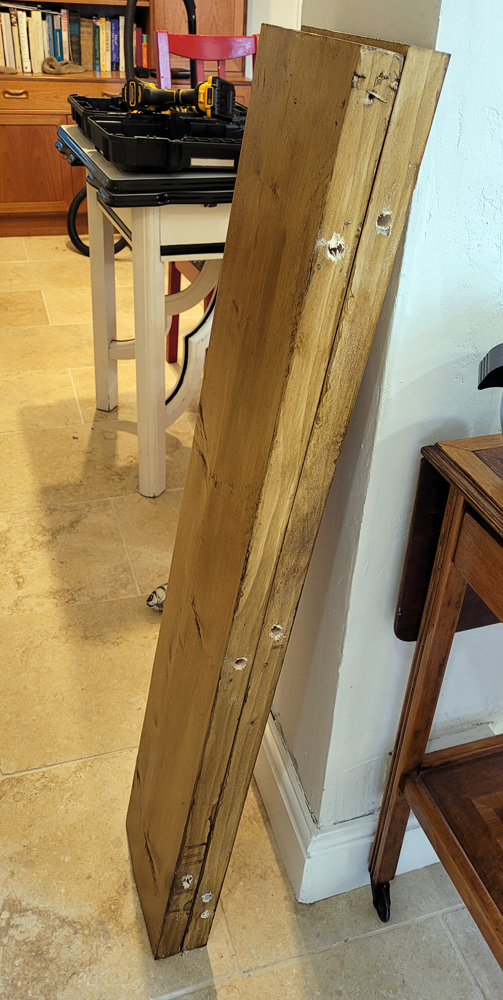
Cut a scaffolding board into shelf lengths (these were for the recess next to a chimney breast). Sand, stain, and varnish the shelves then three holes in each 12mm in diameter and 100mm deep.
Cut the board across the holes 50mm in. This is the piece that will bolt to the walls using a concrete anchor:
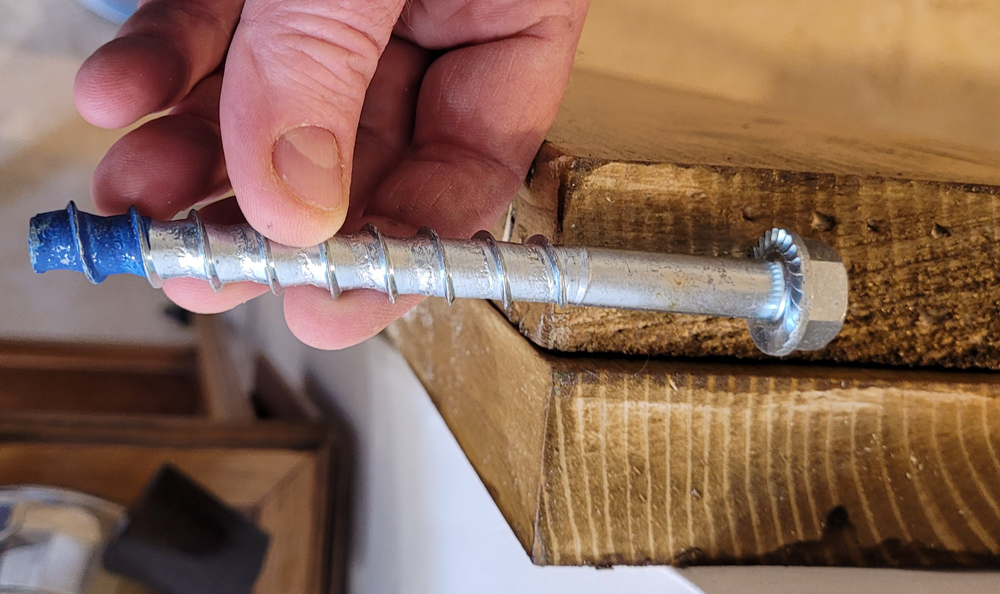
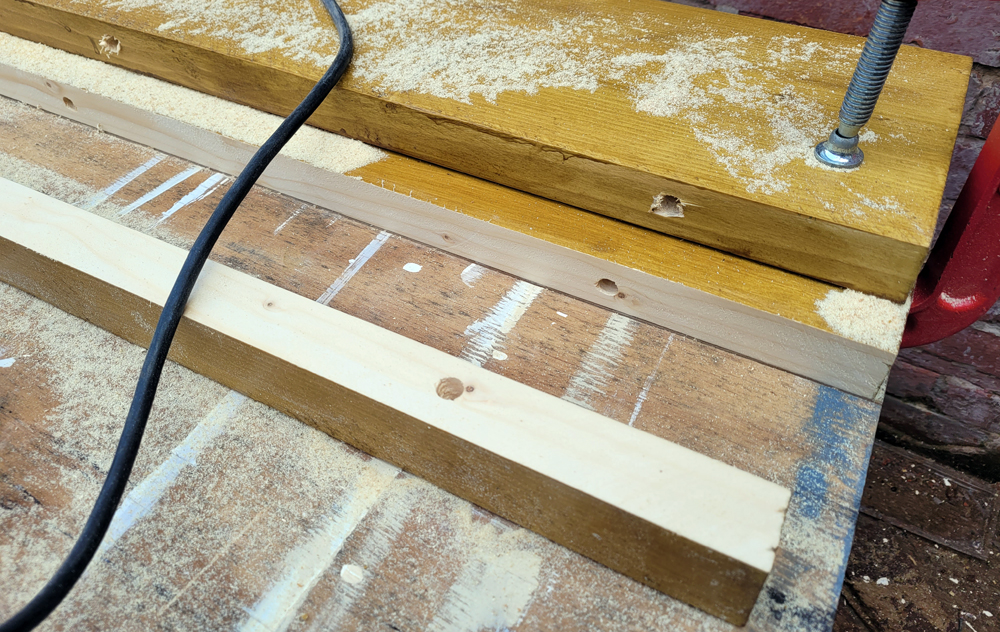
So, drill two more holes parallel to the previous ones in each of the 50mm deep wall mounting boards. Use a 25mm wood bit to make a pocket for the anchor head to recess into.

In the larger pieces drill the now 50mm deep holes down until they are at least 100mm deep. Cut six 12.5mm diameter by 150mm long dowels and fit them into the wall mount. Bolt the assembled mounts to the wall where you want the shelves.
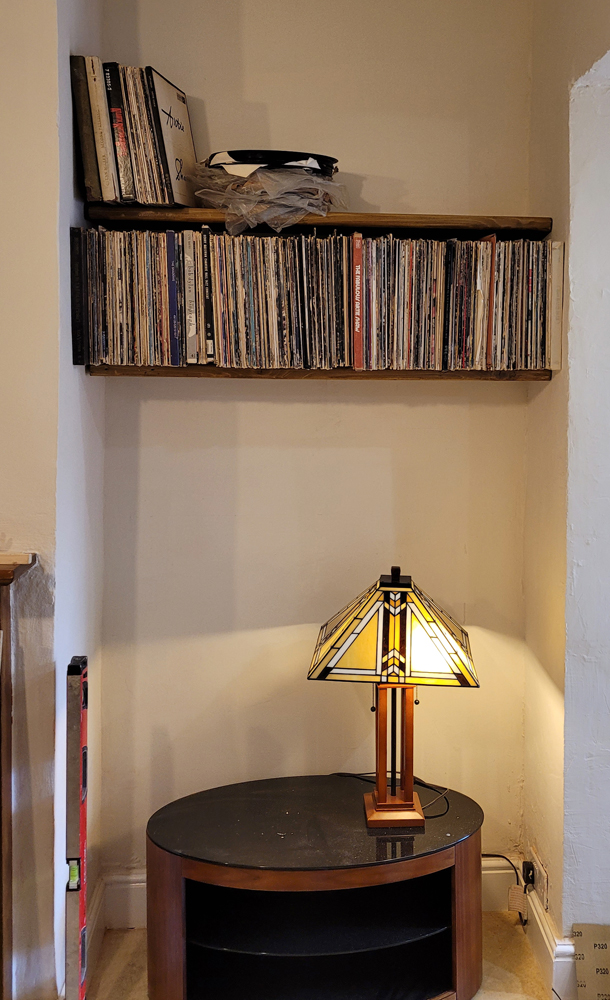
Slide the big piece over its corresponding mounting piece. Use a piece of scrap wood as a baffle to hammer against until the two pieces of shelf meet again.
Put shit on the shelves.
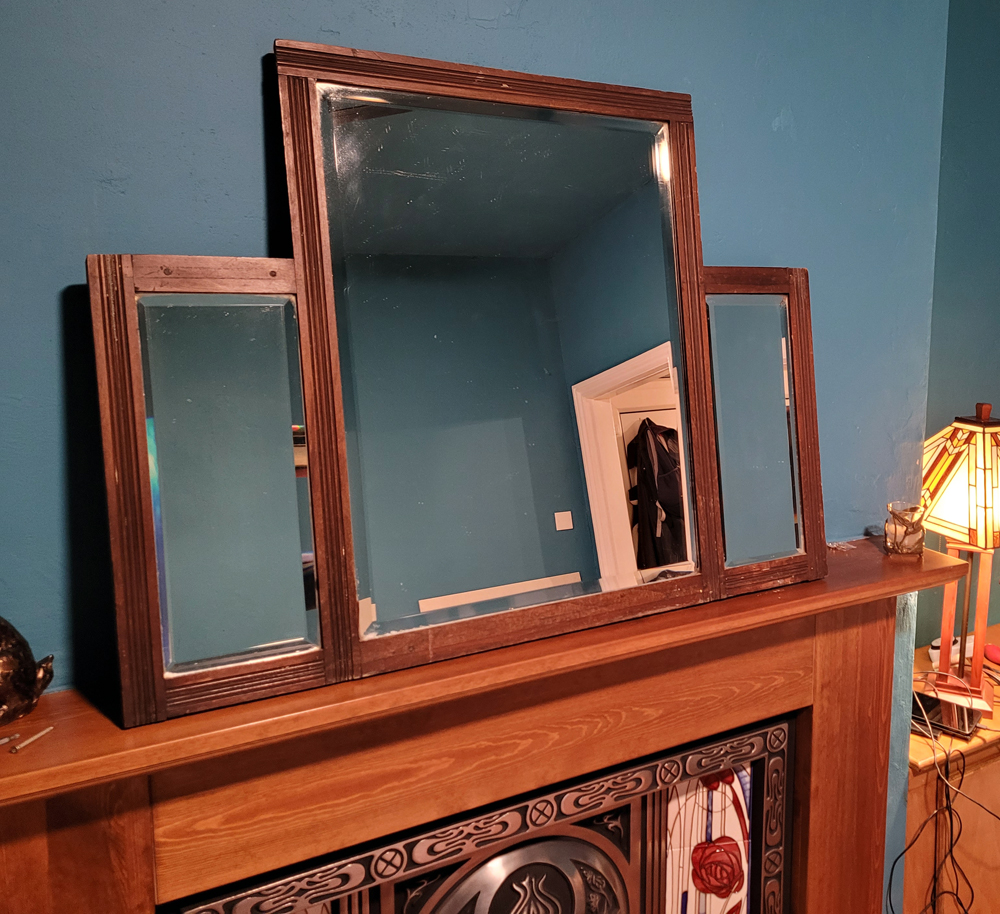
Jackie found a mirror in a charity shop and it had some nice deco features despite obviously coming off someone’s dressing table. The mirrors have sagged little off alignment and painting was imminent so I removed the mirrors.

One of the small, side ones was lined with a piece of Kemp’s Mercantile Gazette. The Smith-Premier typewriter appears to be a N0. 4 which went into production in 1901 but was largely superseded by the No. 10 which first appeared in 1908 (an American machine so this might be as late as 1910 but it shows the mirror contemporary with the house which was built in 1907). The headlines referring to coachbuilding, saddlery, and harness trades along with an ad from Eastwood’s Tannery (Derby) also lean toward a pre-WW1 date.

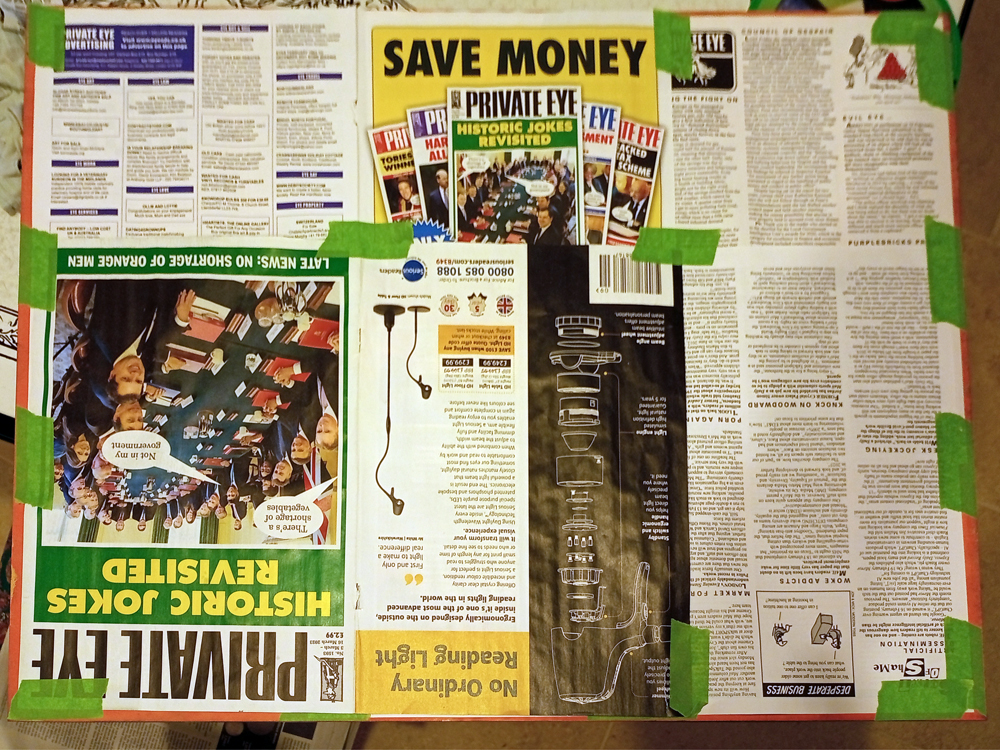
The mirrors cleaned up pretty well and the silvering is good. The copper paint behind the silver (the orange showing behind the KMGazette pages) is not further painted for protection but I didn’t have anything to put over it I was certain wouldn’t damage it (dissolution, oxidation, etc) so I just cut some new backing sheets out of back issues of Private Eye.
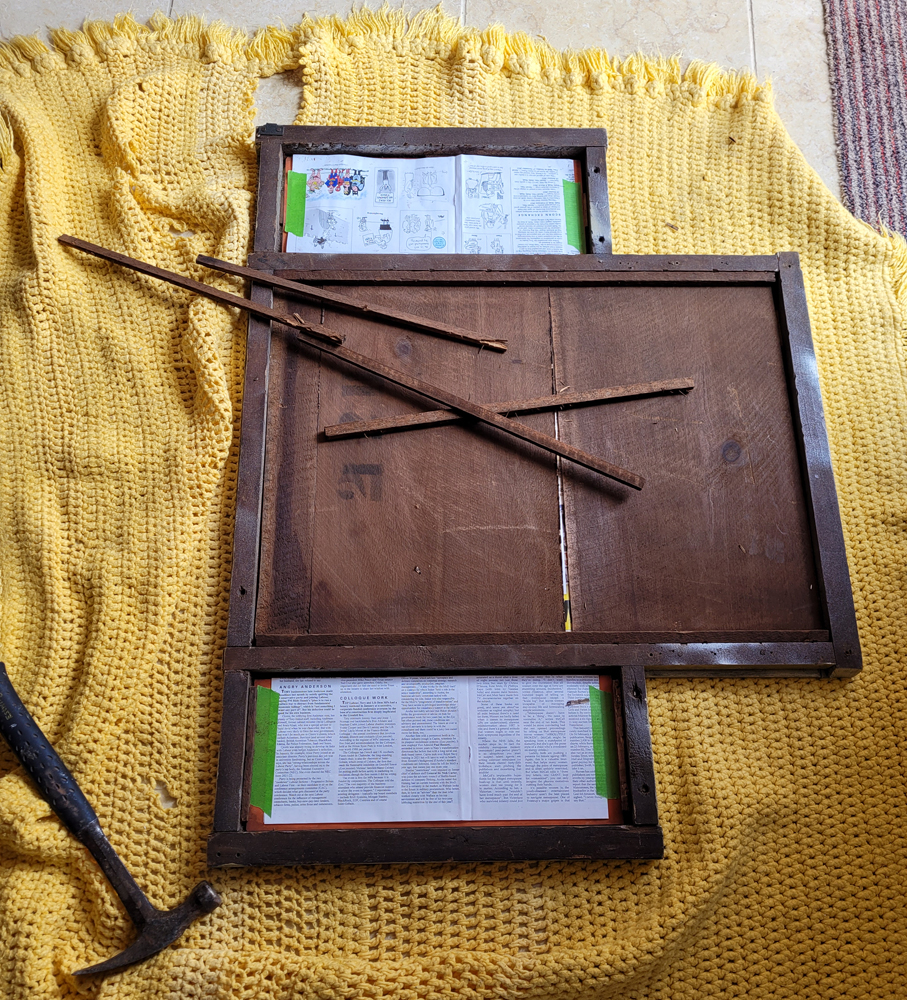
Reassembly used the original framing I could salvage and using as many shims as I could make out, supplemented with some small glazing brads.
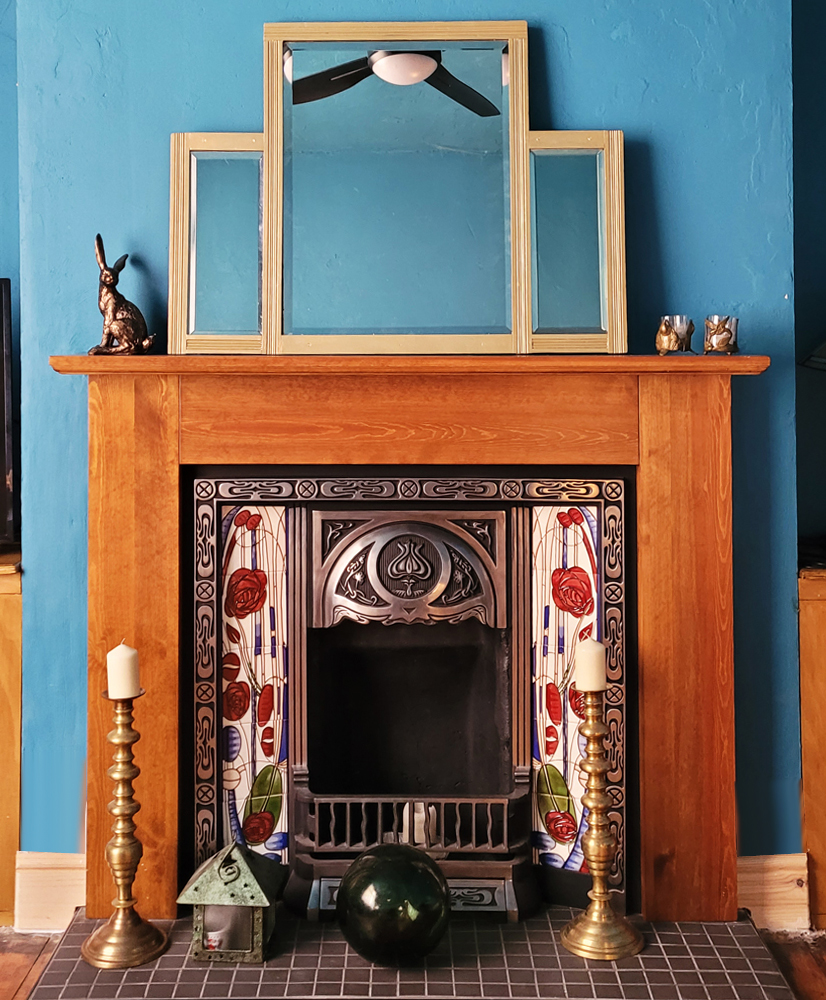
It still needs a cable or chain to hang it, but essentially this is resting place minus about 36cm:
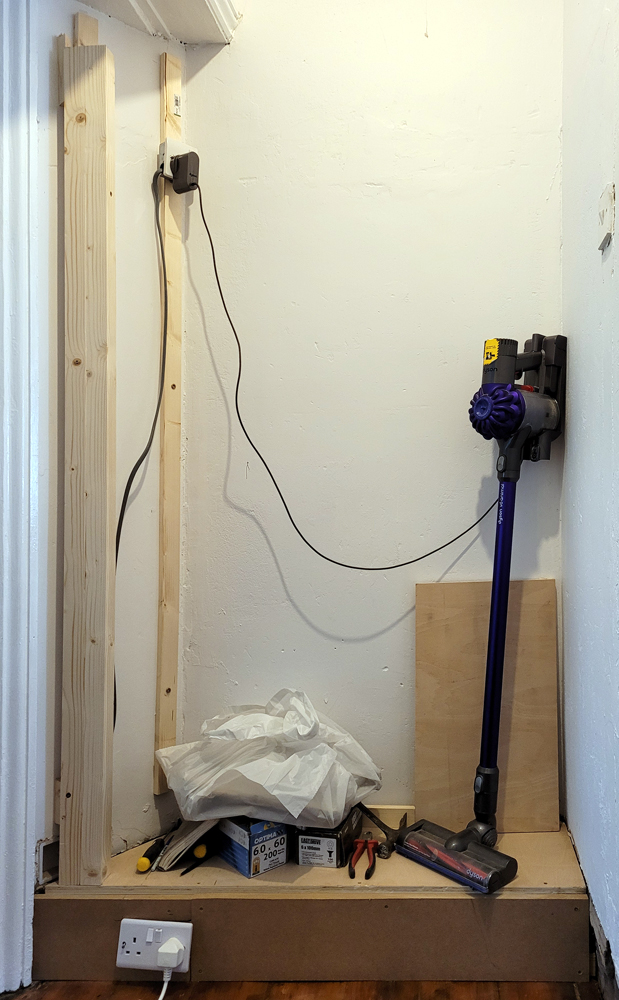
The next cabinetry on our list fills in the unused space on the upstairs landing as a linen closet — sheets, towels, blankets, and bog roll plus a space for the cordless vac to charge.
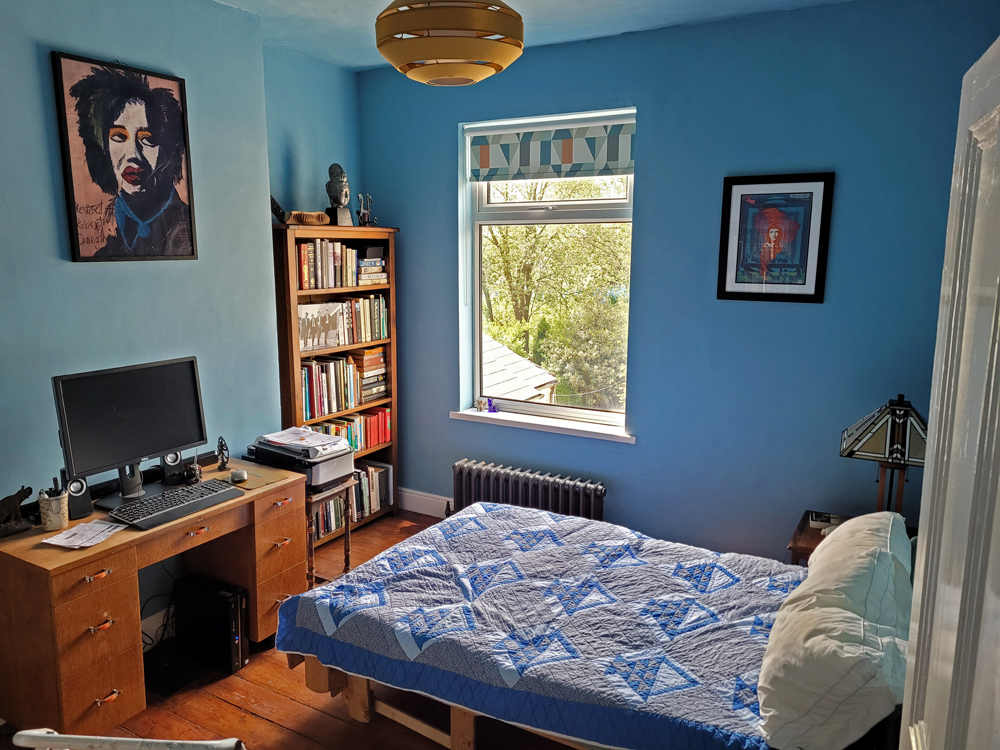
Until this was finished, we had all of those items stacked on some shelves in the office/second bedroom but we needed the space to make room for a visitor in May.
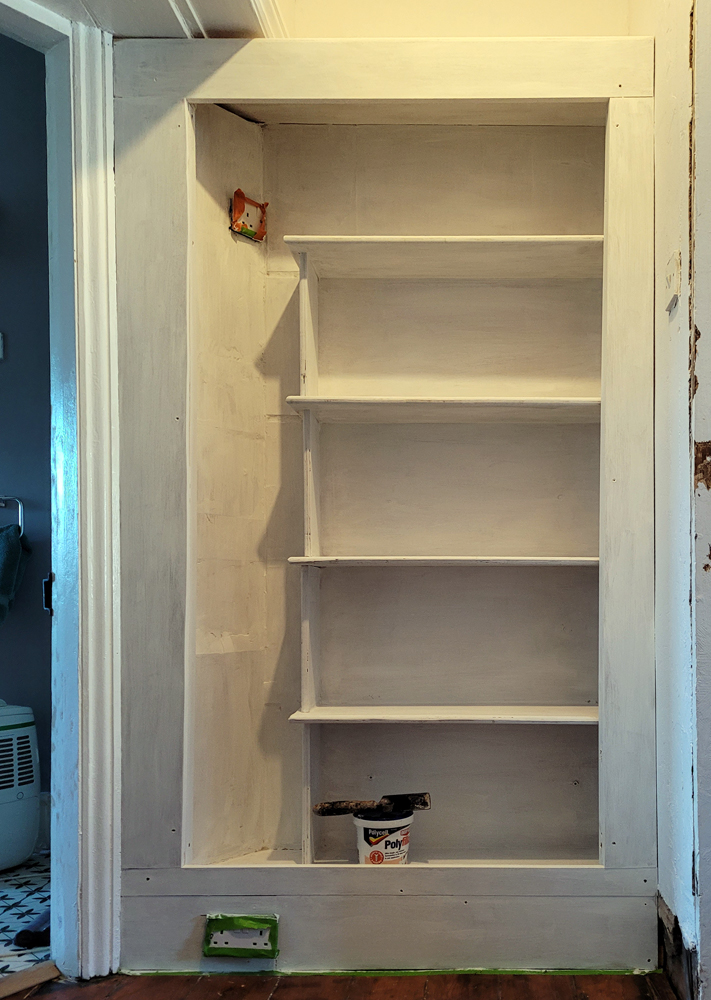
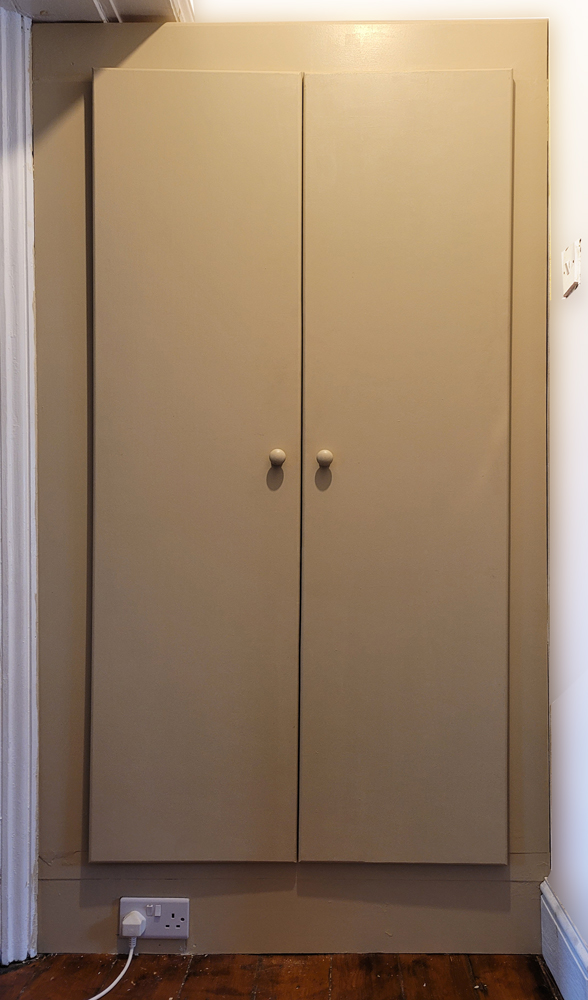
Eventually, we’ll wallpaper around it.

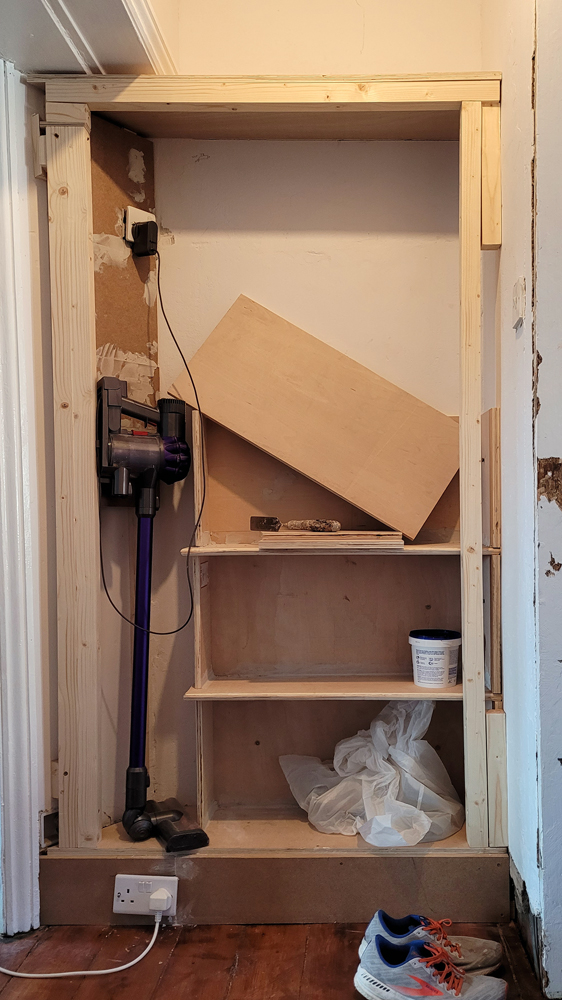
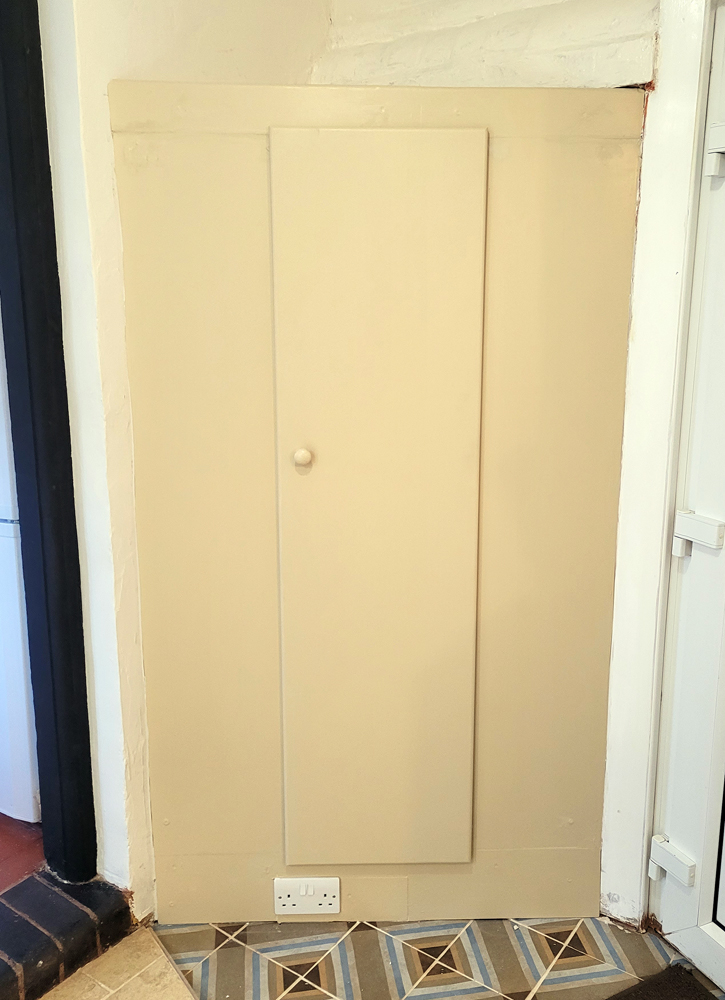
Following on from the living room cabinetry, we desire to rid ourselves of wet clothing hanging on the doors and shoes piled by the kitchen. The framing of a coat closet takes into account the need for the now-covered wall to ‘breathe’ so as to mitigate mould (I took out a brick and installed a vent then left a 2cm deep path to another vent at the top of the cupboard).

There’s another vent in the floor to help damp clothes dry, the electrical sockets were moved to the plinth and a single was placed at eyelevel inside-left for the cordless vac to charge.
I wasn’t as careful with this one since it is getting painted (the living room ones really demanded precision, this one just needs a light sanding and final coat). But, it works.
